Tuesday, May 21, 2013

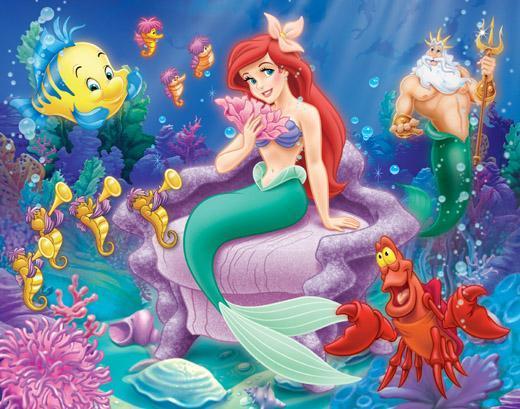
Little mermaid inspired

Since little mermaid is my favorite disney princess I tried my best to make these ones look decent and as close as I could to the "sea" theme. This is the second time im doing this using only the tips, so it went a little easier.


Materials used:

  • wet n wild megalast "blue visionary"
  • wet n wild megalast "i saw a comet"
  • NYC "big apple red"
  • ceramcoat paint: basic blue and white
  • red and lavander acrylic powder
  • 2mm emerald glitter
  • red glitter powder
  • light blue half pearls
  • a lot of topcoat
  • small nail art painting brushes
First I cut the tips to the size I liked them and coated them with a thin layer of gel so they wont get deformed. I applied red nail polish on the middle ones and sea blue on all the rest. Then I applied a thin layer of topcoat, because in the next step if I made any mistake i could easly fix it with water without smudging the nail polish or make it lose its shine.
When they were completely dry, I started painting the bubbles. I mixed basic blue with white to make it really light. I used a small brush with a very short tip.
.
I let them dry completely before making the highlights on the bubbles. I used another brush for this, the thinnest one I had and white paint.
Until they were drying I applied a thin layer of glitter polish on the red nails (wnw "i saw a comet").
After it dried I applied a layer of topcoat on the top half of the nail and dipped it in green 2mm glitter. It gave a really nice scales effect. You can also use a brush for the glitter, but i find the dipping way more convenient. Extra glitter can be brushed off with a fluffy brush once the topcoat is dry. The shape doesnt have to be straight.
I added some more topcoat to make the nail sticky and put on half pearls one by one in a semi circular shape  going up..
Next step was to add the sea stars. Since I'm bad at making those free hand I used a mold. Even if they came out with some extra edges it was fixed when I coated them. I used red and lavander acrylic powder.
I added some topcoat on the stars and dipped each star in red or lavander powder glitter. YES I love glitter!!!!
I sealed everything in a lot of topcoat. I don't remember how many layers but I know I had to let them dry for few good hours so i won't leave fingerprints on them or smudge them when trying to put them on.
DeeNails has a brand new facebook page. Like and share it please. It would mean a lot to me <3
https://www.facebook.com/deenails0
If you use my design and post it please mention "DeeDee Livesay inspired". Thank you

Thursday, May 9, 2013

Briar rose-Disney themed


I watched 1959 Disney's Sleeping beauty few days ago and I wanted Aurora themed nails soooo bad. I'm a big kid, I still love disney princesses and I think I always will. So i came out with this colorful 3D design, japanese decoden style. Im completely in love with it, BUT i would have loved to be able to actually paint aurora's figure on one or 2 of them. Sadly, im in the painful learning process with cheap paints that im so going to replace soon. These nails were built as tips, which was a first time thing for me. They're reusable if they come off, because they are acetone resistant and the glue on the back can easly be taken off with a Q tip with acetone if it bulids up and I want to reuse them.

Here's the materials I used for them. Time: about 5 hours including the tips building


  • full cover nail tips neutral or white
  • nail polish NYC "tribeca silver"
  • nail polish Wet n Wild Megalast series "tahitian pearl"
  • small painting brush
  • acrylic liquid
  • acrylic powder in baby pink, baby blue and grass green
  • baby pink caviar beads
  • pale pink rhinestones 3mm and 1mm
  • 1mm silver glitter
  • topcoat
  • strong nail glue


I first have to make the tips fit my nails. Without applying them on I used full coverage tips in neutral color. I never did this before so my way doesn't mean it's the right way. I cut them and shaped them to fit my nails and after that i coated them with a thin to medim layer of transparent uv gel. I did this so i can use acetone on them without ruinning the tips. I put them under the uv light for about 4 minutes and after that cleaned them up with acetone based cleanser and buffed the surface. Here's the result before making the design on them.

When they were done i set them on toothpicks with some tape on them so i can have some precision. I polished the ones for the middle fingers with NYC "tribeca silver" and all the rest with Wet n Wild Megalast series "tahitian pearl".

 With a painting brush I made diagonal lines right and then left using my NYC silver color, so i can get something similar to the design underneath. The strokes i used are thicker. I applied a layer of topcoat and let it dry for 10-15 minutes.
After that, I started building the roses with my baby pink acrylic powder , 1 on each nail except the middle finger one. There's a large variety of tutorials on youtube on how to do that. Roses were the first things i learned how to sculpt with acrylic. I added small leaves on every rose using my green powder. Using my 1mm glitter and a toothpick with topcoat on the tip, I added small dots clustered togheter in groups of 2-3 in the areas where the painted lines intersect.
The middle nails are a little time consuming. Using my baby blue acrylic powder i sculpted a big heart on each nail. I coated them with topcoat and with a small brush added some blue powder glitter over it. Also after adding some topcoat around the heart, i started putting on pink caviar beads around it. I used a toothpick with a little topcoat at the end to pick them up. Oh the tip of the nail i applied some 3mm pale pink rhinestones with spaces between them. In the empty spaces I then applied 1mm rhinestones of same color. I also added some 1mm stones under the heart in a semi circular way.

I sealed everything in 2 layers of topcoat. Here's how they looked before being applied over the natural fingernails.

To make them stay still i buffered my natural nails, dehydrated them with 100% acetone and added a thin layer of nail glue on them. I then added a thin layer on the bottom half of the tip and applied it on my nail by pressing on it for about 15 seconds on each nail. The nail glue I like the best is from KISS. Make sure the tips are 100% dry before putting them on to avoid smudging the design because of the topcoat.

And here's the final result after putting them on.

DeeNails has a brand new facebook page. Like and share it please. It would mean a lot to me <3
https://www.facebook.com/deenails0
They were a lot of fun to make. If you ever try my design and post a better tutorial for it, please include "DeeDee Livesay Inspired" somewhere. Thank you
Sunday, May 5, 2013

Candy crush

Here's a design I came up with after being addicted to that crazy match 3 game on facebook. This thing was so random, but it came out funky and surprisingly not as bulky as I was expecting for using half pearls and other 3D decorations.


Took me about 2 hours to make it from start to end, which is usually nothing for how much a design takes me normally. I'm planning on doing another one with more colors in the near future Here's what nail polishes and tools I used for it:


  • LA colors plain black 
  • NYC "highline green"
  • Wet n Wild megalast "mixing it up"
  • Wet n Wild wildshine "kaleidoscope"
  • Wet n Wild "femmi fatal"
  • LA colors art deco "baby pink"
  • dotting tool
  • random half pearls and flat backs

  1. Apply black nail polish on all the nails except the ring finger nails where you apply a grass green. Make it as bright as possible.
  2. On the green nails apply 1 uniform coat of wet n wild "mixing it up" or any nail polish that has big round or hexagon glitter. For the next step make sure the glitter polish is as wet as possible.
  3. Grab your decorations and add some half pearls on top of the wet polish. Don't use bring colors so you can create a nice contrast with the green. White, pale pink and pale yellow work great. I got this great mix of flatbacks on ebay for 99 cents. You can find the link where I got them from and other cool things in my pinterest board here http://pinterest.com/pin/375698793884582732/
  4. Time for the dots on the rest of the nails. With a big dotting tool start adding green dots on your nails without crowding them. I used the same green that I used on my ring finger nail. When it completely dries, use a baby pink to add some other dots. You can intersect them with the green dots , whatever makes you happy. With a small dotting tool add some neon pink dots here and there to fill in some gaps. You don't need many of them, just to add some contrast.
  5. After all dots dry add a thin layer of transparent glitter polish with as many colors in it as you can find. I used wet n wild shine "kaleidoscope"
  6. With the polish still wet, start adding beads on all your nails. Don't cluster them togheter, 3-4 beads on every nail is enough. I used different shapes and different sizes and colors for every bead. Light blues, yellows, pinks and some white did the trick for me
  7. Add 2-3 layers of topcoat at the end to make sure the beads won't fall. If you do it right this design should last 2-3 weeks. But who can help not doing their nails often....
At the end make sure you find use for your cutticle oil


Have fun !

DeeNails has a brand new facebook page. Like and share it please. It would mean a lot to me <3
https://www.facebook.com/deenails0
If you use my design and make a better tutorial, id appreciate if you mentined somewhere "DeeDee Livesay inspired" thank you