Friday, May 30, 2014

Rasta and rainbows


Hi everyone!

Today I'll be sharing a design I've done, this time not on my nails.

I've been doing nails recently and I kinda love it. My model for today is Abby.

She has really short nails, a little hard to paint on, but her design is fully painted with acrylic paints.

After applying a base coat I used the smallest brush I had to create a mix of ranbow lines and rasta colors, with black accents in the corners.

One hand has main ranbow with rasta accent on the ring finger nail, and reversed on the other hand.

Pretty cool ha? Only took about 3 hours to complete LOL.

Everything was sealed with 1 coat of top coat to protect the paint from bleeding in water.

The paints and brushes were both bought from born pretty store. Links below:


You can use code DILIC10 for 10% site wide discount and free shipping!


Have fun and thank you for stopping by!

DeeDee

Follow me on twitter https://twitter.com/DeeNails
Become a fan on Facebook https://www.facebook.com/DeeNailsX
Follow my Tumblr http://deenails.tumblr.com/
NEW! my Nailpolis gallery http://www.nailpolis.com/artists/DeeNails


Thursday, May 29, 2014

Purples and bows


Hey everyone!!

Here's a quick mani I done few days ago. I was in a rush and I remembered I ordered these super adorable stamping plates a while back, that were still sealed and I digged through them and found this cute bow design that I HAD!! to use.

Did 2 coats of Kleancolor pastel purple and 1 coat of LA colors Color Craze.

Polish is called jewel tone and you can find it here if your drugstore doesn't have it.

Did one layer of top coat and for stamping I used Wet n wild megalast White topping and Broadway nails black out.

First I stamped a background with black from this plate. This is from bornprettystore and its number 12025. You can find it here for 2.99 or 199 right now on discount.


The second plate is the adorable one with bows, item nr 12173  Find it here  for 1.54 right now (2.99 normal price)


For every bow I used a 2mm clear rhinestone to add some bling. Rhinestones also from born pretty store and you can find them here 

Use code DILIC10 for 10% discount and free shipping

Sealed everything in 1 layer of top coat and voila. Easy and effective.

Have fun and thank you for stopping by!

DeeDee


Follow me on twitter https://twitter.com/DeeNails
Become a fan on Facebook https://www.facebook.com/DeeNailsX
Follow my Tumblr http://deenails.tumblr.com/
NEW! my Nailpolis gallery http://www.nailpolis.com/artists/DeeNails

Saturday, May 24, 2014

New stamping plates from born pretty store

Hi everyone!


If you love stamping as much as I do, you'd love to know that born pretty store has brought in a bunch of new stamping plates!

Not only the classic metal ones, but also the silicone ones that I didn't use yet, maybe you can share some techniques with me because I'm planning to try them out soon anyway.

The code for 10% discount is BPSL91 and you can find all the new arrivals here http://www.bornprettystore.com/stamping-nail-c-268_94.html?ver=2657.
Also I'f you're as messy as I am you'd love to know that they brought in some new cases for storing the plates. They look like CD/DVD cases but smaller, and they're a must have for those plate collectors.


Friday, May 23, 2014

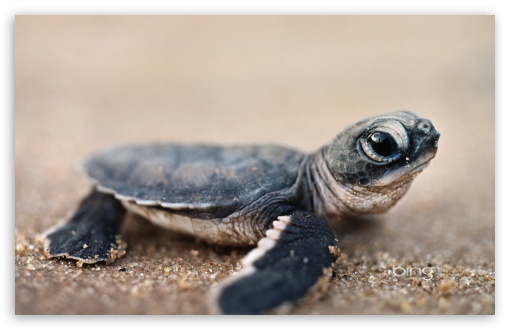
World turtle day mani

I'm one day late to post this one, but I wanted to share with you my "turtle" manicure I wore for world turtle day.

Turtle day is on may 23rd and it was founded in 1990 by American Tortoise Rescue. If you wanna know more about it here's the link http://en.wikipedia.org/wiki/World_Turtle_Day

Nailpolis, which I love dearly, had an event up for this day, which is how I got to know about this. I love turtles!


It was a very fast, easy to do manicure for short nails.

I did 2 coats of Kleancolor pastel yellow and 1 coat of Milani Gold Glitz.

The turtles are stamped. I dont really know where I got the plate from, but my stamper is the awsome XL squishy stamper from. www.bornprettystore.com . You can get it HERE for $4.46. It's my favorite stamper ever.

I added some sparkly accents with 2mm clear rhinestones that you can find here 

You can use code DILIC10 for a 10% discount on any item in the store and free shipping. 

Thank you for stopping by!

DeeDee

Follow me on twitter https://twitter.com/DeeNails
Become a fan on Facebook https://www.facebook.com/DeeNailsX
Follow my Tumblr http://deenails.tumblr.com/
NEW! my Nailpolis gallery http://www.nailpolis.com/artists/DeeNails

Friday, May 16, 2014

How to use full cover water decals


Hi everyone!

I am not able to post very often. But I'm having a lot of fun trying out these cute water decals I was provided with.

You can find them HERE for normally 1.99 but right now they're discounted. There are 24 designs to chose from, all of them gorgeous. I picked out the most colorful one, cause I just love all those candies, and chocolates and roses all mixed togheter.


It is quite easy to use them. Might need 1 or 2 nails to practice, but thankfully they come with 12 pieces instead of 10 so if you mess 2 up there's no big deal. It comes off easy with simple nail polish remover.

Here are some easy steps to put them on:

  • Paint your nails with a light colored polish or preferably white to make the design pop.
  • Cut the size you want to use. You can cut them all and aproximate which will go on what nail.
  • Get a cup with warm water and hold them in for 20-30 seconds.
  • Slide the decal off the paper with your fingers or with tweezers if you find it easier that way. Make sure you don't let it fold.
  • Glide it on the nail. Use the round side of the decal at the base of the nail and adjust it.
  • Gently press on the decal following the curve of the nail. Insist on the sides and on the free edge. Make sure there are no folds or air bubbles, or the decal will lift.
  • Twist the excess at the free edge and gently file it using up and down motions until the excess falls off.
  • Using horizontal strokes will make the design come off so avoid that.
  • Wait till it dries completely before giving finishing touches like filing it to perfection.


I use gel top coat to seal them in. You can use simple top coat, but gel one will make it last way longer. No matter what top coat you use, make sure you insist at the free edge to avoid the lifting.

You can use rhinestones or other 3D decorations to add bling or accents to the nails, after the design was sealed.

As usual, you have the video above for a quick step by step guide.

Have fun!

Thank you for stopping by!

DeeDee

Follow me on twitter https://twitter.com/DeeNails
Become a fan on Facebook https://www.facebook.com/DeeNailsX
Follow my Tumblr http://deenails.tumblr.com/
NEW! my Nailpolis gallery http://www.nailpolis.com/artists/DeeNails