Thursday, September 24, 2015
Fun paint splatters nail art
Hello everyone!
Super fun and and easy nail art today! I never really wore paint splatter designs like this on my nails before, so I am absolutey in love with it.
It's a very easy to do manicure, beginner level, anyone can do it.
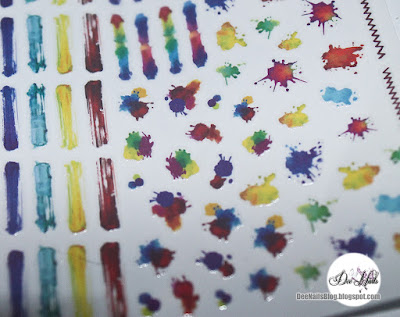
I received a very neat sheet of splatter decals from bornprettystore.com. You can find them >here< for $3.69 on regular price but they are discounted now. I saw there weren't many reviews and demos for these decals, so I decided to give them a try.
There are a lot of stickers on the sheet. For my manicure I used about 8 of them and I barely made a dent. There are splatters and brush strokes on it, every color. They're perfect for any artsy person.
For the base color I used a white polish to make all those colors pop. I put 2 thin layers and over them I used a, what I like to call, dirt polish :D I used "What's the splatter" from Pure ice. You can normally find that brad at Walmart.
You have to let everything dry before putting on the decals. These are not water decals, they're simple stickers, very thin ones, but if the polish is not try, they will bubble under it and lift. Not even top coat will hold them down.
I applied my stickers on 2 fingers from each hand, and for all the others I put some pink and green crackle studs from a wheel you can find at BPS >here< They are $4.38 on regular price, but right now you can find them on discount.
I sealed everything with top coat and used a thin layer of matte surface oil to take the shine off. Matte oil will also speed drying time on the nail polish.
This design was overall very easy and fast to make. What takes time is mostly the drying time. Everyone can do something like this, especially with decals and the effect is so awesome!
I hope you liked it and if you want any of the above products you can use the code below for a 10% discount and free shipping
Thank you for stopping by!
DeeDee
Disclaimer: The product featured was provided for review. Everything else is purchased with my own money.
Monday, September 7, 2015
Temix stamping polish review
Hello everyone!
I am finally back to posting. I was unable to take photos and work with small details for a while because of a problem with my eyes, that still didn't go away. So if there's any blurr in my next photos is unintentional and please excuse it, but I'm still adjusting.
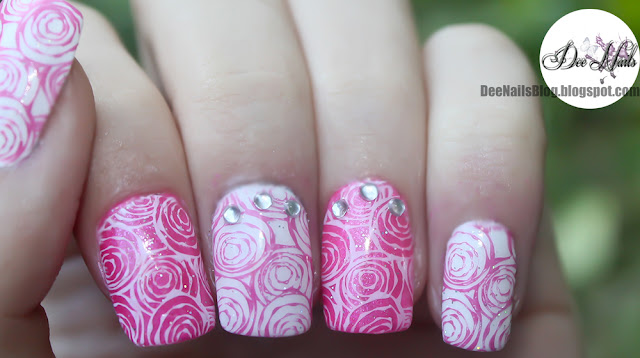
I have a very cute polish to review today. I was very excited to try it out since it was sitting on my nail art desk for couple weeks. I was very curious about the Temix stamping polishes, because my first and only special stamping polishes were from the born pretty store collection. This one is also from www.bornprettystore.com but not made by them.
You can find it >here< for $4.00 on regular price, but I caught it on a discount of like 50% off. It is on discount even now so you can find it reduced pretty often. The polish comes in a bottle of 6ml, pretty small, but if you only use it at stamping it's going to last a long time.
The formula of it was pretty thin, but opaque. I thought it wasn't going to be a lot different from the BPS polishes, but I was pleasantly surprised when after I tried it on a white sheet of paper the design came out perfect. there were absolutely no spots where the polish wasn't picked up, and I used my bad stamper.
The difference between the other set of stamping polishes that I own and this polish, is that the Temix polish is not sheer at all. The other white stamping polish i used for this design is a little sheer, giving the outlines a little pink tint from letting a little of the base color go through.
Be careful though, the formula takes a little longer to dry compared to my other stamping polish. Let it sit 10 minutes before applying top coat, because it has a tendency to smear if even slightly wet.
I am definately planning on getting more colors. The color I used here it's nr 2, and they have 12 colors you can chose from.
For this particular design I used
- WNW wild shine "french white creme" - base color
- pink holo polish from Anchor&Heart laquer- base color
- Salon perfect- "spirit fingers"- glitter topper
- plate BP-73 for the rose pattern ($2.99 from BPS)
- 1.5mm rhinestones
I hope you like it and if you try it you can tell me about your experience with the Temix stamping polish. For any of the products mentioned from BPS you can use the code below for 10% discount and free shipping.
Subscribe to:
Comments (Atom)


